Getting started
In this side quest, you’ll learn how to make the classic Pong game! That may seem a little daunting, but don’t worry - you are provided a code skeleton that’s been organized in, hopefully, an understandable way. Your task will be to implement 3 functions:
initialize,keypress, andmodel, preferably in that order. You are also provided a solution to look at in case you get stuck. Feel free to email Jesse (jessew13@email.unc.edu) with any concerns.
Setup
We’ll be using pygame. Go to your terminal and type pip install pygame. This will install it if it’s not installed.
Also, create a pong directory somewhere in your workspace and create a file inside. Copy the skeleton code into the file. It also includes comments with links to documentation for provided code, if you’re interested.
Here’s the barebones sample solution. You might want to peek at the solution after each step/substep to make sure you’re on the right track.
A fancier sample solution with more features might be released later (TM). It hasn’t been coded yet.
And a quick but important tip: In this course, you’re accustomed to starting your code from scratch. It’s also a valuable skill to be able to read someone else’s code, understand it, and build upon it. Please take a few minutes to analyze the skeleton code. Get an idea of its organization and make sense of the predefined variables (you should probably read through Step 0 first). Read the docstrings and comments - they’re written specifically for people to read!
Step 0: Understanding the problem
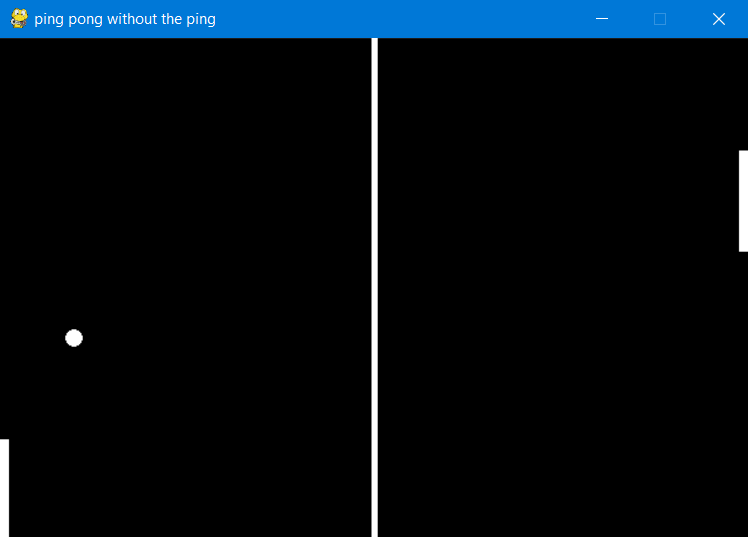
It’s always important to understand the problem and our tools before we start coding! Here’s a picture of the barebones output:
Here’s the same picture with some very important labels.
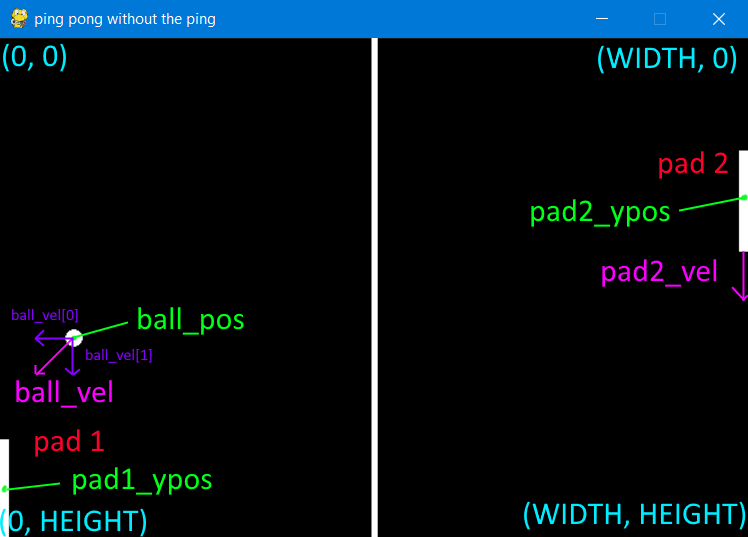
Some things to notice:
- Coordinate system
- Pygame’s coordinate system has (0, 0) as the top left corner.
- +x is in the east direction.
- +y is in the south direction.
- So, the bottom right corner is
[WIDTH, HEIGHT], whereWIDTHandHEIGHTare named constants (provided in skeleton code) for the max width and height of the screen.
- Paddle 1 is the left paddle. Paddle 2 is the right paddle.
- Paddle and ball positions are (in this implementation) single points in the center of the object.
- This is heavily used in the implementation of
model. - Paddle positions are of type
int, just a y coordinate, because their x coordinates are constants. Ball position is of typelist[int]with 2 elements, an x and y coordinate. - Check for understanding: In this picture, what is
pad1_ypos? It isHEIGHT - HALF_PAD_HEIGHT. - If paddle 1’s position were to have an x component, what would it be? It would be
HALF_PAD_WIDTH. - Disclaimer: we should probably add/subtract 1 from some of these expressions since the coordinates are zero-indexed. But I think it’s unnecessary complexity, so the sample solution doesn’t do that.
- This is heavily used in the implementation of
- Velocity
- Paddles and ball both have velocity.
- Essentially, we add an object’s velocity to its position each game tick (or frame) to update its position.
- The paddles just have y velocity, so
pad1_velandpad2_velare of typeint. - Ball has x and y velocity, so
ball_velis alist[int]:[x velocity, y velocity].
Lastly, take a look at the main() function in the skeleton code. It’s already been fully implemented for you, so you shouldn’t need to modify it. Note that model() and keypress() are part of a while True: game loop, meaning they’re both called several times per second. keypress() constantly evaluates keyboard input and model() constantly calculates and changes positions and velocities. Inside model(), once you get to it, you should add velocity components to position components only once. The overall effect, since model() is called constantly, will be prolonged movement.
Step 1: initialize()
Initialize the declared global variables to their default values (described in docstring). These are the values that the objects are set to before the game begins and each time a player scores. This should be 4 simple lines of code, but remember to use the named constants provided to you.
Step 2: keypress()
This function takes keyboard input using pygame.key.get_pressed(), which is assigned to the keys variable. Conceptually, it’s simple. According to its documentation, it returns a sequence of bool, indexed by key constants.
For example, keys[pygame.K_w] evaluates to True if w is pressed (at the time the function is called) and False if it isn’t.
Use keys to track the states of the states of w, s, and the UP and DOWN arrow keys on the keyboard. The constants are pygame.K_w, pygame.K_s, pygame.K_UP, and pygame.K_DOWN.
Set pad1_vel and pad2_vel according to the keys that are being pressed. Use the PAD_VELOCITY named constant.
Step 3: model()
This is the last step! But it is difficult (lots of calculation) and has a few substeps. To keep things organized, model() has docstrings that tell you where you should put your code for each substep. You could also define your own helper functions.
Code that draws the paddles and ball has been provided so that you can check your work as you go along (run using python -m ..., based on the directory you have it in and the name of the file).
You should do the substeps in this order since you’ll be guided more in the first step. You’ll be given less instruction in later steps.
If you’re stuck on a step, draw a picture!
- Paddles: check vertical bounds
- First, write down what the lower and upper bounds for
pad1_posare. They’re not0andHEIGHT. You should read through Step 0 again if you don’t remember the coordinate system and how position is defined for this program. > By lower and upper bounds, I mean lowest possible point on the screen and highest possible point on the screen, not min and max value. The min value is actually the highest point on the screen because of the coordinate system… - If
pad1_yposis between those bounds, addpad1_veltopad1_ypos. - Else, if
pad1_yposis at the upper bound and its velocity is in the downward direction, addpad1_veltopad1_ypos. This prevents the paddle from moving off-screen. - Else, if
pad1_yposis at the lower bound and its velocity is in the upward direction, addpad1_veltopad1_ypos. - Check your work by running the program.
- Copy and paste the code and modify variable names for paddle 2.
- When checking for out of bounds, the solution uses
<=and>=instead of==to be safe. Though,==does work here.
- First, write down what the lower and upper bounds for
- Ball: check vertical bounds
- Check if the ball is at the upper or lower bounds. Use the provided named constants. You might want to draw a picture.
- What should happen to its velocity?
- Ball: check horizontal bounds
- Check if the ball is at the left bound.
- Once it’s there, what are the two possible cases that could occur? Hint: for one of those cases, use a function you’ve already implemented.
- How should you handle those cases?
- Copy and paste the code to check the right bound. You’ll need to modify it.
- Ball: update ball position
- Almost done! This should be only two very simple lines of code.
Conclusion
Congrats, you’ve made Pong! You’ve learned quite a bit about simple game design in pygame along the way.
Bonus
Here are some features you might want to implement. As a coder, you might need to do some Googling to figure these out. Feel free to modify the parts labelled DO NOT MODIFY now that you’re done.
- Player 2 thinks it’s unfair that the ball is always thrown in his direction. Randomize the direction of the ball.
- Add a pausing feature.
- Display the score on
screen.
Here are some thought experiments.
- Did you catch the edge case in
keypress()? What happens if someone presses two keys at the same time? - Comment out
screen.fill(BLACK)inmain(), which should be line 45. What happens? What does this imply? - In the solution, check out the
MAKES_BOUNCING_LOOK_NICERconstant, where it’s used, and comments on those lines. - For code of larger scale than a class exercise, organization is very important, as you may have seen. In Java (which is currently the language used in COMP210 and COMP310), you’ll get hands-on experience with organizing large(ish)-scale projects. You’ll also learn about encapsulation and Model-View-Controller, which aren’t used in this project but are relevant.